Is It Easy to Create Magneto Website
Magento is an eCommerce platform that's developing rapidly. A lot of hosting providers offer one-click installation for configuring your new store online, but you can still set up these things on your own if needed!
If you are looking for a comprehensive guide on how to build a Magento website, look no further. Our team of experts has put together this 101 guide to help beginners get started. With our guide, you'll be able to create a new website in Magento with ease. There's no need for any special expertise or knowledge of web development – just follow these steps and get started today!
Table of Contents
- What You Should Know About Magento Before Starting Your eCommerce Website
- Understanding Magento Editions
- Why create a new website with Magento but not on other platforms?
- How to Build a Magento Website: Step-By-Step
- Step 1: Check the server requirements of Magento
- Step 2: Choose a Web Host and Domain Name
- Step 3: Download and install Magento
- Step 4: Configure Your Store Functionality
- Step 5: Select and install a theme for your store
- Step 6: Explore Extensions For Added Functionality
- Step 7: Fill out your Magento website settings
- Step 8: Set up your products pages with pictures and prices
- Step 9: Select Your Payment and Shipping Options
- Step 10: Preview and release your website
What You Should Know About Magento Before Starting Your eCommerce Website

Understanding Magento Editions
Magento is a popular eCommerce platform for many reasons. It offers a high degree of customization, scalability, and security. However, before you start learning how to build a Magento website, there are a few things you should know.
Magento is available in three different versions: Magento Open Source, Magento Commerce, and Magento Commerce Cloud. Each version has its own unique set of features and price points, so it's important to choose the one that's right for your business.
- Magento Open Source is the free and open-source version of the platform. It's ideal for SMBs that can afford an in-house developer team or some certain level of IT outsourcing costs.
- Magento Commerce is the premium edition of the software, with additional features and support options.
- Magento Commerce Cloud is a cloud-based solution that includes all the features of Magento Commerce, plus additional cloud hosting options.
In terms of costs, how much you'll pay for your Magento Commerce or Magento Commerce Cloud license depends on your annual revenue, so rest assured that no overcharge will occur.
>> Learn more: Magento Open source vs Commerce: Which one is the better?
Why create a new website with Magento but not on other platforms?
There are many reasons why Magento might be the best platform for your new website. For one, Magento is designed specifically for eCommerce businesses. It has all of the features and functionality that you need to build a successful online store. Other platforms may lack some of the features that are essential for eCommerce businesses, such as a built-in shopping cart, product management tools, adding creative saleoff campaigns, and order processing capabilities.
Another reason to choose Magento is its scalability. Magento is a very scalable platform, which means it can grow with your business. If you start to see a lot of growth in your business, Magento can handle it without any problems. Other platforms may not be able to scale as easily, which could lead to performance issues or even outages.
Magento is also a very secure platform. It has built-in security features that help to protect your website and its data. Other platforms may not have as many security features, which could leave your website and its data vulnerable to attack.
Finally, Magento is a very flexible platform. It offers a wide range of customization and integration options, so you can really make your website your own. Other platforms may be more limited in terms of what you can do with them, so you may have to compromise on some aspects of your website in order to use them.
Overall, Magento is a great choice for someone looking to create a new website. It has all of the features and functionality that you need to build a successful online store, and it is also scalable and secured. If you are looking for a platform that offers a lot of flexibility, Magento is definitely worth considering.
How to Build a Magento Website: Step-By-Step
Step 1: Check the server requirements of Magento
Before you begin how to build a Magento website, it's important to check the server requirements of Magento. You'll need to make sure your server meets the minimum requirements in order to run Magento smoothly. These requirements are listed on the Magento website.
- Web Server: It is possible to use Apache or Nginx as a web server. If you use Apache, Magento's Apache documentation has specific module settings that you should evaluate.
- Operating System: Linux x86-64 and other Linux distributions, including Ubuntu and RedHat.
- Memory: Your Magento setup requires at least 2GB of Random Access Memory (RAM).
- Database: Magento is fully compatible with both version 5.6 and version 5.7 of the MySQL database.
- PHP: Magento recommends PHP 7.3 for all of your PHP-related needs. In addition, the PHP installation instructions include comprehensive directions for adding the necessary extensions. Aside from setting up OPcache, this guide will teach you how to make your Magento installation perform more smoothly.
- Security: Secure Socket Layer (SSL) certifications are recommended for PayPal integration and data transmission security.
Moving on to the next step after carefully considering and understanding all the requirements can save you time and money. You don't want to spend your hard-earned money signing up for a hosting plan, only to find out that it doesn't offer enough memory or that the company uses Windows servers. Take the time to do your research and understand exactly what you need before making any decisions.
If you're not sure whether or not your server meets the requirements, you can contact your web host and ask them to check for you. Once you've confirmed that your server meets the requirements, you're ready to move on to the next step!
Step 2: Choose a Web Host and Domain Name
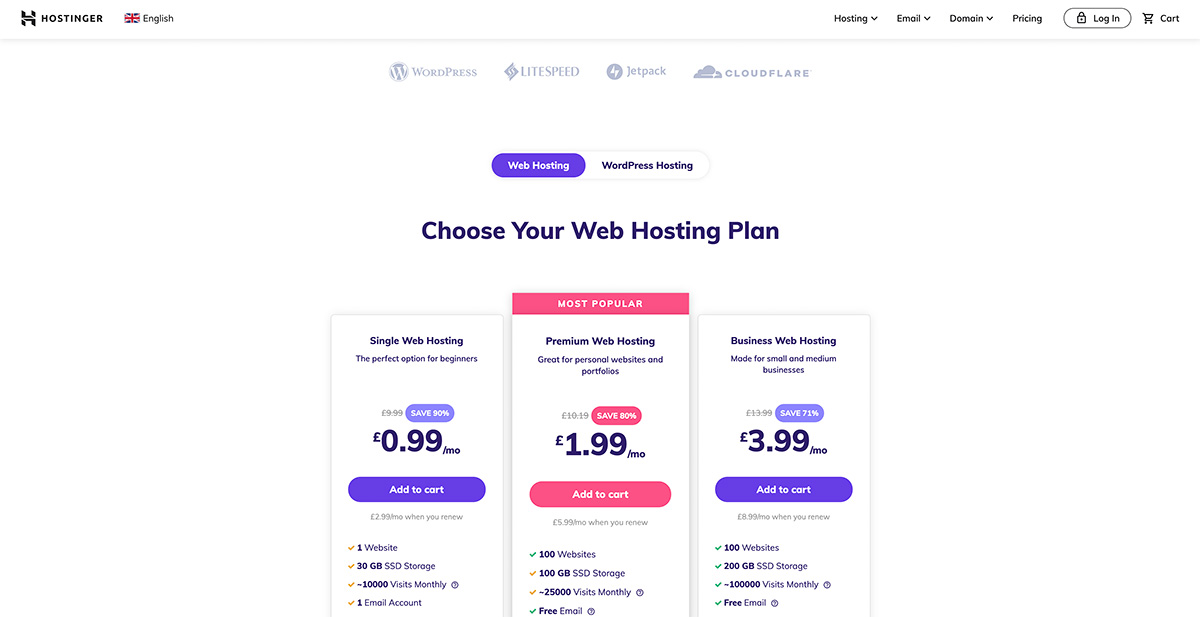
Now that you know your server meets the requirements for running Magento, it's time to choose a web host and domain name for your site. For example, if you are on a budget but want high-quality service then Hostinger could be the perfect fit for you! They offer one-click installers which save time and money in addition they come with plenty of security measures so users don't have anything else worries when it comes down to them.

Furthermore, Hosting with one-click installation options for Magento has become popular in recent years. Some hosts that offer this service include Bluehost, Hostinger, and DreamHost … There are many different web hosting providers to choose from, so take some time to research your options and select the one that's right for you.
>> Learn more: Top 10 Best Magento Hosting Providers for eCommerce
Step 3: Download and install Magento
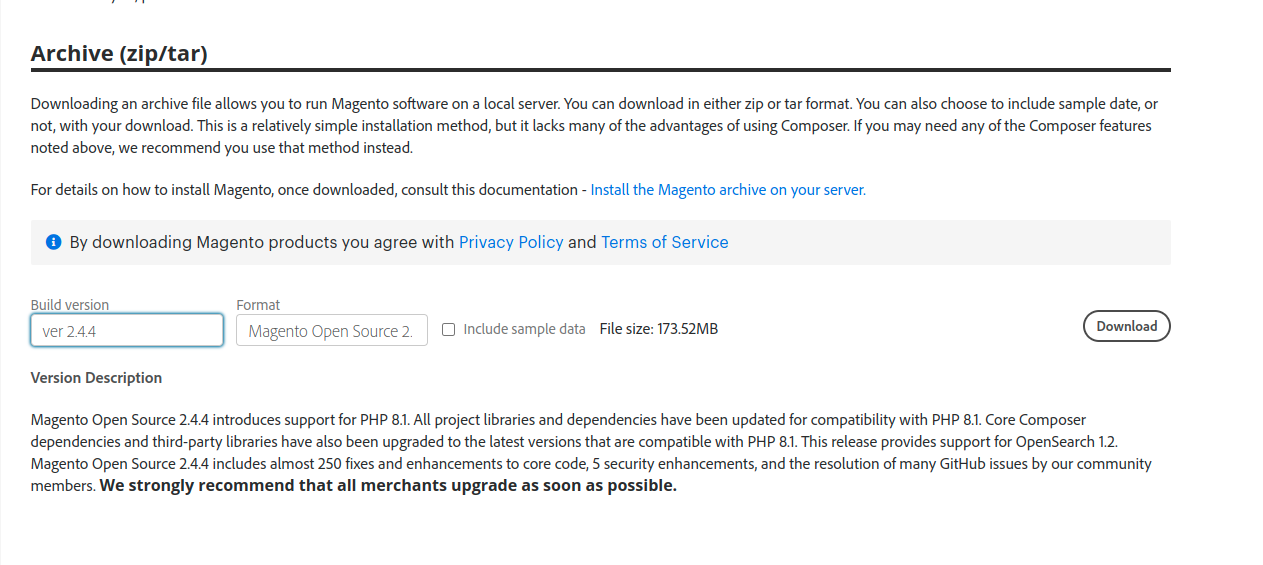
After you have secured a web server and a domain name for your website, the next step is to download and set up Magento on your website. This will install all of the necessary files onto your server so that your website can go live. However, we highly recommend that you use a professional Magento development service to get your site up and running sooner. With a professional service, you can be sure that all of the necessary files will be installed correctly and that your site will be up and running in no time. So if you're looking to take your Magento online store to live as soon as possible, we recommend using a professional service to get the job done right.
Step 4: Configure Your Store Functionality
The next step of how to build a Magento website is to configure your store's functionality. Magento offers a wide range of features and options, so take some time to familiarize yourself with them.
Before beginning the process of actually installing Magento on your server, you will need to personalize your admin username and password. You will be requested to do so before the installation procedure begins.
After that, you will need to choose a location on your server for your Magento installation and decide on the URL route that will lead to the admin login page for your Magento store. Once you have finished choosing these options, select the Install option from the drop-down menu.
When everything is finished, you will get a confirmation message that says:

After you have completed the process of installing the software, you are now able to click on the Administrative URL and log in using the username and password that you generated during the setup procedure. This will lead you to the new dashboard for your Magento account, where you can start the process of developing your new eCommerce website.
Step 5: Select and install a theme for your store
One of the great things about Magento is that there are many different themes available for your store. This allows you to customize the look and feel of your store to match your brand.
If you're looking for an affordable theme that's ready to use, then Magento Marketplace is the place to go. With so many great themes on the marketplace, you'll be able to find one that's perfect for any budget. You can find dozens of beautiful themes with hundreds of dollars and they come from experienced developers who have created them themselves. Magenest also offers some Magento 2 themes with reasonable prices and huge customization capability.
Step 6: Explore Extensions For Added Functionality
Now that you have a theme installed for your store, it's time to fill out your Magento website settings. You can find and install an extension to your store site in the same way as we outlined for adding a new theme. Searching on marketplace platforms or agencies' sites like store.magenest.com will show all available extensions, with pricing details displayed alongside each entry so you know what's available before making a choice!

There are so many extensions available for Magento, depending on your objectives. Some categories you might look at include:
- Marketing: ones that help with content or cross-selling/up-selling techniques to increase sales via collaborative campaigns across social media channels such as Facebook ads and LinkedIn adverts
- Security: related tools including creating a reCAPTCHA during checkout which prevents spamming; plus detecting if somebody is trying maliciously enter the credit card details of another person who has entered their own personal
- Payment gateways: Gateways like PayPal and Stripe make it easy for you to collect payment from your customers. They provide a safe way of doing so because their systems will automatically identify which currency is being used on the site
- Shipping: If you offer tangible things, it is smart to add services to your website that allow clients to track the progress of their packages as they are shipped. There are other plugins available that will assist you with managing your orders.
- Analytic: Tracking the behavior of your customers with analytics can help you make educated decisions about how to improve your website.
Step 7: Fill out your Magento website settings
Customizing your eCommerce site's settings should be the last thing on your to-do list before you begin adding products. To do this, navigate to Stores > Settings > Configuration:
The following are some factors that you might want to take into consideration:
- The customer's account settings, such as whether they have a website or global presence.
- The email address that is used to notify customers of transactions.
- Whether the price scope should be per product/service sold on their site and if so what type of products it is
- Shipping options with payment methods
- Setting up the location, time zone, and currency
There will be a list of alternative configurations for all of the extensions that have options you can change. If you make any adjustments, you will need to select the Save Config option before the new settings can be applied before you can use the application.
Step 8: Set up your products pages with pictures and prices
The steps to set up your product catalog are easy and straightforward. If you go into Catalog- Products, there will be a list of all the products that come with Magento already preinstalled on them as well as an option for adding new ones at any time by selecting Add Product.

The dropdown menu helps you to narrow down the type of product that best suits your needs.
You can choose from a variety including:
- Simple products: a standard physical item.
- Configurable products: Simple products that can be customized in a variety of ways.
- Grouped products: Products that can be purchased individually or as part of a larger bundle.
- Virtual products: There are a variety of "products" that don't need to be sent or downloaded, such as online courses and services.
- Bundle products: Products that cannot be purchased separately are known as bundles.
- Downloadable products: Digital products that may be downloaded, such as e-books.
The template that you make use of to construct the related page will be determined by the product type that you select. You will also have to include a name, price, and Stock Keeping Unit (SKU) number for the product. Dimensions, weight, stock quantity, and a description are examples of details that are optionally provided.
After that, you have the option of uploading a photo or video of your product. This is quite important because the vast majority of consumers prefer to view what they are about to buy before they actually buy it. Even if you offer downloadable or virtual objects, you should still include an image or graphic that can represent your digital products or services. This will help customers better understand what you provide and what they can expect to receive.
When you are finished, select the Save button that is located in the upper right corner of the screen. Make sure the Product Online switch is activated in order for your products to become visible to customers when they visit your online store. However, prior to putting any of your wares on display, you should wait until all of them are prepared for customers to purchase.
Step 9: Select Your Payment and Shipping Options
When considering an online purchase, a customer's level of satisfaction with the available payment and delivery alternatives is frequently a major deciding factor. The good news is that Magento gives you a broad variety of choices for each of these aspects of your online store.
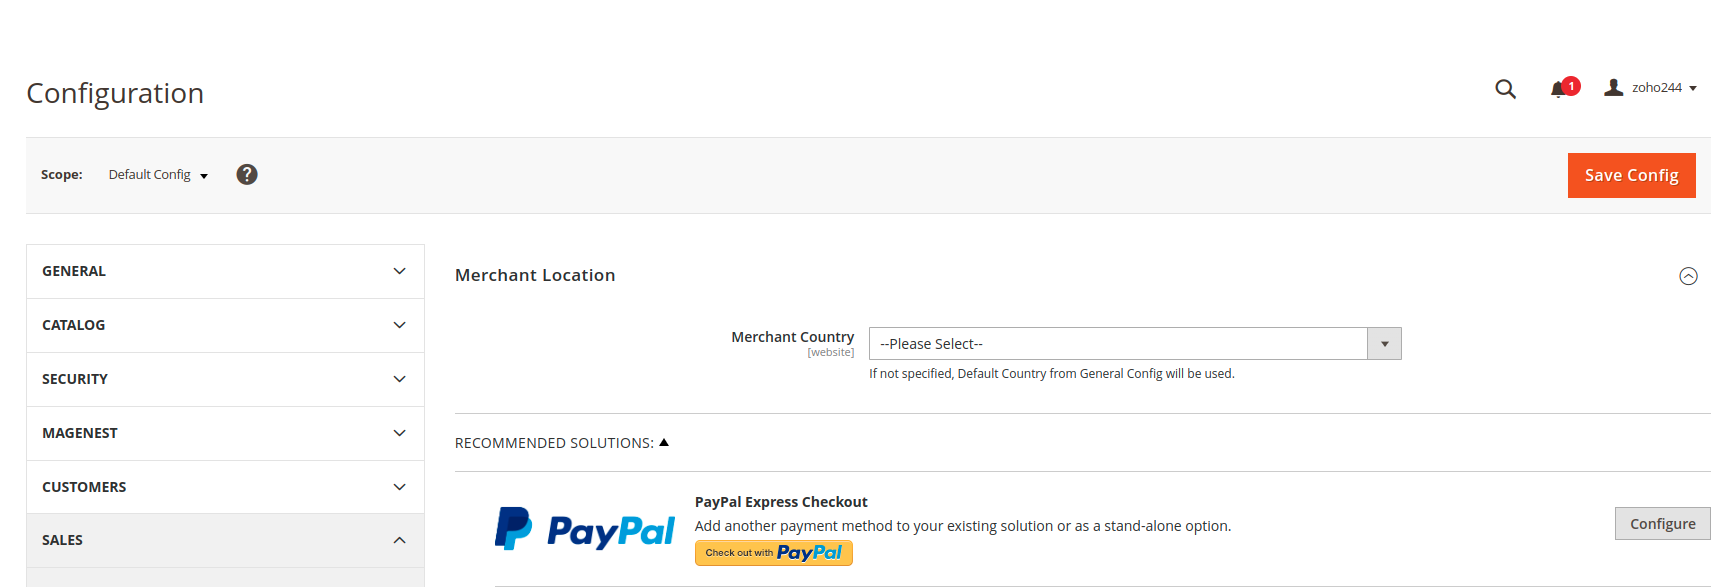
You may access these options by heading to Stores > Settings > Configurations. Then, Payment Methods will be shown under Sales in the left-hand sidebar's collapsible menu.

You'll need to come here to set up the built-in payment methods that are included with Magento. It is possible that this procedure may take some time because you will need to set up various platforms if you choose to employ extensions in order to widen the possibilities that are available to your clients.
The Configure button for each accessible payment gateway will show its full range of settings. You will next be required to provide information, such as which types of credit cards you will accept and whether or not you want to save the credit card data for future transactions.
Unfortunately, Magento's built-in shipping platform has been discontinued as of September 2019, therefore customers cannot use it. However, by utilizing an extension, you will be able to incorporate a solution for transporting your items. Since the settings differ depending on which one you choose, you should check the instructions provided with your tool to learn more about how to use it.
Step 10: Preview and release your website
One of the most important steps in how to build a Magento website is making sure that you're editing files on your local machine rather than directly from scratch with no history. This way, if there are any problems or issues along the way—such as when we discovered some formatting bugs while designing our site–our changes won't accidentally destroy what already existed beforehand.
This method also has its benefits beyond just saving time: It helps prevent mistakes by allowing us to see exactly where everything goes within Magento's codebase.
The final step in building a website is to put all of your Magento files on the webserver. You can do this via either local development software or a File Transfer Protocol (FTP) client, which will publish it online so that users may find you
Final thoughts
Magento is a powerful platform and it's no wonder that it's one of the most popular eCommerce solutions. We hope this guide will provide all the instructions you need on how best to build your Magento eCommerce website from scratch. If you want to create or redesign an online store, Magento should be at the top of your list. And if you need more help along the way, don't hesitate to contact us. We would be happy to walk you through every step of setting up your Magento site so that you can start selling products and services online as quickly and easily as possible.
Show More
Hide
Source: https://magenest.com/en/how-to-build-a-magento-website/
0 Response to "Is It Easy to Create Magneto Website"
Post a Comment